Cob Wargaming
Be'lakor
Painting Guide
Hello Cobbers!
Once again it's another straight and simple painting guide, nothing fancy just easy to replicate techniques, mainly drybrushing! We like it simple here at Cob Wargaming, none of our paint jobs are ever going to win a Golden Demon award but they do look good enough for a battlefield and an army. Hopefully you'll agree, enjoy and possibly even take something away from our latest painting guide.
First up the model needs to be assembled. Sometimes this is easier said than done as we found with Be'lakor! He has been on our shelves for years in various states of assembly. Getting the arms, wings and base to stick on were a real struggle. The pointing arm stuck on with super glue but the sword arm just would not hold, so we resorted to using Green Stuff which gave us a much better hold. The Wings simply would not stick on, being metal the weight of them is simply too much so we decided to simply remove them! We filled the gaps in with some more Green Stuff and left him as a wingless demon! As for the base we used a mixture of more Green Stuff and a plastic Elven Shield to give us better purchase and get us a good grip from the plastic glue.

For the undercoat we used 2 layers of Chaos Black Spray Paint. A dark basecoat for a dark model is natural but is also much better at hiding missed spots and errors than a lighter undercoat. With metal models you are forced to use 2 layers of spray so don't put the first layer on too thick. The first layer is always going to seem runny and won't cover the model very well so don't worry if it looks bad after the first layer, just be patient, wait for it to dry and give it a second blast. Such is the way with metal miniatures.

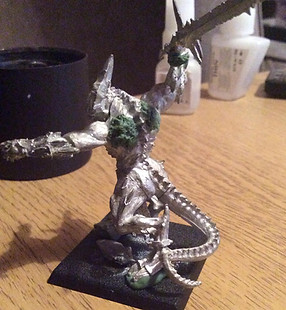
Next up, it's time to give the skin the first coat of colour, a heavy drybrush of Eshin Grey. Be sure to leave plenty of black in the recesses to emphasise his muscles. The Eshin Grey won't stand out too much but will set a nice platform for the next stage.
Drybrushing rather than painting will also help him to look much more dramatic, this may not be the most scientific term but you'll see what we mean when he's done!


Follow up on the Eshin Grey by lightly drybrushing Administratum Grey onto the skin. Go quite heavily on the face to help draw the viewers eye to this point of the miniature. The next part is really up to preference but we did a second drybrush of Administratum Grey over the chest, abdominals, thighs and back to show more natural highlights where the light would catch. That's all for the skin, we avoided putting an extreme highlight of white onto him because we didn't want to take anything away from him to looking dark and evil.
With the skin done, it's finally time to add some colour to the miniature. Something light but not too cheerful! We chose Tallarn Sand and painted it carefully over the horns, spine, finger nails, claws and any other boney bits we could find. Some parts took a second coating to get a good coverage and block them out properly.


Our preferred highlight to Tallarn Sand is Ushabti Bone. Give all the areas that you painted in Tallarn Sand a Drybrush of Ushabti bone. This should pick out the natural ridges of the horns and really help them stand out. Along the spine, finger nails and claws we concentrated the drybrushing more towards the tips, this gives them a slight dry and withered look and also a natural shadow where they sink back into the skin.
These parts will be washed later.
Metal!
Paint a solid coating of Warplock Bronze onto the armour plates, piercings and shackles. Once again a good covering is required but it pays to be careful around the edges. We chose not to do the chainmail in bronze because we wanted to make it look like it had a different texture.


Stormhost Silver time!
This is a really bright silver paint so go sparingly with it! Give the Bronze parts a medium drybrush, picking out any ridges, edges, spikes or battle damaged parts. Then drybrush carefully over the chainmail being very careful not to get any into the gaps or over the edges onto the skin. Give the meat hook a layer of Stormhost as well. Leave the sword for now.
Wash o'clock
You guessed it, it's time to get out the trusty old Agrax Earthshade. Give all the horns, spine, claws and fingernails a wash to vastly improve their look, we found it best to concentrate the Earthshade in the grooves and joins to skin. This creates more natural shade and also hides any slight mistakes making the joins and protrusions seem more natural. We have left this stage till now because we also wanted to use it in slight patches on the metal to take some of the shine off and make it look stained. Give the wash plenty of time to dry before moving onto the next stages.


Now its time for yet more drybrushing! This one will test your skills to apply it accurately. We wanted the armour plates to look more like they were on an ancient and ethereal creature rather than just your average battle damaged monster. So we chose another bright metallic colour: Auric Armour Gold. This goes well with the really bright silver colour. We were very careful when we drybrushed this, we only wanted it in patches and in the middle of the armour plates. It was also important not to get any on the armours edges so the silver still made them look scratched.

Now let's make a start on the Demon Sword. For this we used Runefang Steel which is a touch darker than Stormhost Silver. We gave the handle and spike a thick drybrush of Runefang Steel and the blade a rough coat. We didn't want the blade to look to perfect at this point, we think it looks more wicked and evil if it is kind of rough and ready, but that is just personal opinion.

Next we gave the part where the blade joins the handle a very light Drybrush of Warplock Bronze. This was simply to help the detail stand out and give the sword a slightly more impressive look.

To make Be'lakor's sword seem more sinister (it is called the Blade of Shadows after all) and less like a silvery lump we gave it a light wash of Drakenhof Nightshade, this was only done in splodges and focused more around the hilt. This was needs to be given plenty of time to dry and so we will come back to it later.

Onto that beautiful face!
The eyes were done simply by using 2 small dots of Evil Sunz Scarlet. This lets them appear beady but with a slight menacing glow about them.
The tongue was painted entirely with Evil Sunz Scarlet and then the front third and edges were given a coating of Emperors children Pink.
The Teeth were very carefully picked out using the smallest brush we could find with Ushabti Bone, we did not use white because that would make them look too clean!
Back to the sword now that the Drakenhof Nightshade has dried. We simply drybrushed a small layer of Stormhost Silver over the blade, picking out the edges, point and the central ridge. That is the sword now finished. However normally we like give the handles on swords a gold finish but because Be'lakor is so evil we decided against it.


Now for the bits hanging off his belt.
Paint the Skull a solid coating of Ushabti Bone, two layers will probably be needed. Be careful not to get any in the eye sockets or the nose hole. Next paint the belt and any armour straps a solid colour of Doombull Brown. Finally and very carefully wash the skull, straps and the meat hook with a thick-ish layer of Agrax Earthshade and leave to dry.
At this point we were happy with the miniature but we decided to try out going one extra step further because he is a character model. we were going to attempt the chaos star!
Using our thinnest brush and some tiny brushstokes we filled in the chaos star with Evil Sunz Scarlet. Getting an ill timed bout of the shakes didn't help but we managed to get it done very neatly.


To give the Eight Pointed Star a fiery glow we used Troll Slayer Orange. This was concentrated around the middle point and each of the arrow heads. Only a slight marking added to the thicker parts of the straight lines, leaving a bit of red adds to the burning/glowing effect.
And with that the model is complete, simply do the base in the same style as the rest of your army and the model is complete. Below we have some pictures taken during some better light to give you a better idea of the finished miniature.

